
Friday, 18 December 2009
Wednesday, 16 December 2009
Tuesday, 24 November 2009
OUGD201 Self Evaluation
1. Your ability to select develop and evaluate a range of appropriate source material gathered through a breadth of appropriate research methods.
My approach to this module was heavily weighted toward research and gathering source information, but in reflection I feel this may have been my most significant downfall despite it being essential to my conceptual progression with the brief.
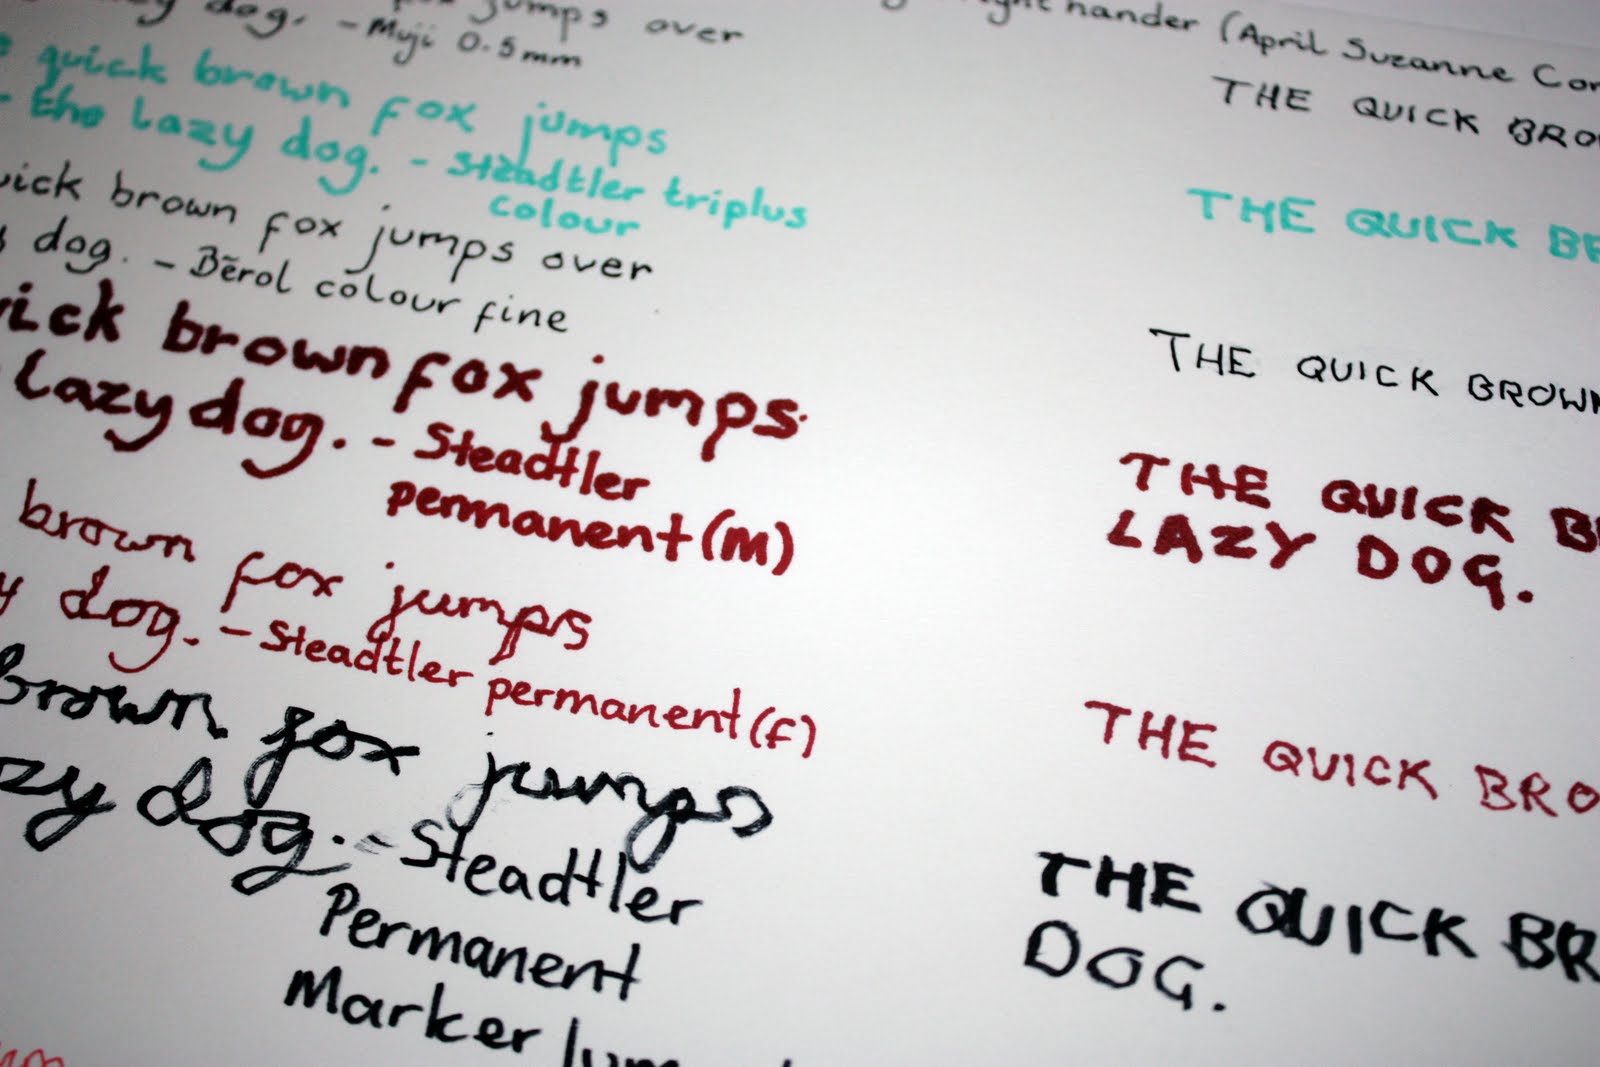
Over the past five weeks the research that I have gathered was relevant and justified and I firmly believe that I managed to explore, develop and evaluate a range of primary, secondary, qualitative and quantitative avenues. In gathering primary sourced information for 'What is Good?' I asked people to respond to surveys posted on E-Studio, conduct left-handed writing experiments and to fill in quick one-to-one questionnaires that were delivered personally. This was crucial in developing my concept as allowing people the freedom to provide the information I needed was particularly time consuming and problematic.
In terms of secondary data, sourcing information from books proved invaluable. Information such as historical left handed personalities and the scientific ways in which left handed people think broadened my knowledge and heavily informed my design decisions. Despite this however, I am confident in saying that I invested far too much time into this process (inclusive of deciding what information would be useful to work from) and as a result my visual development towards a final resolve was neglected, not to mention my exploration regarding crucial print processes that were essential in directly answering the requirements set by the brief.
Overall I am in a position where I do not feel that my skills to select, develop and evaluate were directly at fault; but perhaps in relation to time available I could have identified a key concept earlier and exhausted that option more thoroughly as opposed to multiple ideas... Having said that, my approach to research did pay off in the design process of the 16pg booklet.
2. The level of investigation and experimentation into appropriate production media, processes and technologies.
My investigation into print production media, processes and technologies was in my opinion to a sufficient standard. I took this module as an opportunity to explore the usage of spot and special colours, mono/duo/tri and half toning and in particular print finishes that give a tangible quality to the end product. That said, my experimentation and actual hands-on approach would be something that I'd say I have regrettably neglected a little bit and simply not dedicated enough time towards. Had I have given myself the opportunity to do so, I would of grabbed the bull by the horns and gotten my hands dirty with foil blocking, flocking and embossing/debossing. Needless to say I believe I have educated myself to the best of my abilities through relevant books and publications and therefore this module was theoretically very useful for me.
3. The breadth and quality of practical skills, ideas and design development.
In the literal sense of practical I would say my application of skills was fairly limited and (as mentioned previously) a key area in which I could have explored further. I feel my strengths certainly lie in doing things by hand as identified in last years Design Practice module be it illustration, collage or otherwise; but this again was an area that didn't materialize. Ironically however, the past five weeks were unquestionably useful in developing my approach to design through digital means, more specifically cross-software development. Never before have I switched so fluidly between Photoshop, Illustrator and InDesign to get a design idea completed; and as something I wanted to build upon from last year, I am satisfied. I feel this is likely to be down to the workshops provided; to say they were beneficial would be an understatement. What's more, to expand on this the typography workshops with Graham were in my opinion priceless and as a result I feel my knowledge in this field has improved considerably already.
Looking back to my idea and design development, the module on a whole was a very eye opening experience and insightful as to what can happen when you get caught up in a particular mindset. Through having to change my approach for the 'What is Good?' concept with little more than two weeks to go, I was shown first hand the consequences of losing sight of what was intended originally. In a summative sentence, 'be sure to pursue more frequent feedback from peers and tutors alike' is the lesson I learnt.
4. The documentation, organisation and presentation of your work for this module.
As something that let me down slightly last year, I have to say I feel this was one of my strongest areas throughout the duration of the module and possibly something that has manifested into an obsession. Over the period of the last five weeks I experienced a somewhat overwhelming desire to document, clarify, order and re-order my design development until I was satisfied, and it was a thing that constantly niggled at me until I was either asleep or the problem was resolved. I managed to keep track of my progress in three separate 'To-do List' books as well as a personal diary and action plan sheets. I believe that it showed on submission day where I disturbingly felt quite relaxed in the middle of an action packed studio.
Regarding each brief set, I documented my design development in separate A3 folders that were subsequently categorised chronologically. I obtained additional photographic documentary through cameras and scanning and in light of this compulsion, the presentation of my work for the five A2 boards and critically edited pdf came as a natural progression that required little stress.
The only negative to arise from this is that I may have bitten off more than I can chew in terms of blog posting.
Never the less, this is certainly as aspect of my work ethic that has improved.
5. The success of your final products in relation to the briefs.
Although my resolutions have their positive and negative points, I am collectively satisfied with the end products for both my 'What is Good?' and 'What is Design for Print?' briefs.
Starting with 'What is Good?', the most pleasing aspect for me was the fact that I was able to successfully package a concept that dealt with something which wasn't physical (as opposed to a commonly packaged item such as an event or piece of food). My ability to think laterally was at times pushed to the limit, but this is something I am pleased to have over-come. The resolve itself works conceptually and reflects what was unearthed through conducting thorough, in-depth research. The ability to re-brand an existing organization was also a focus that proved to be of great success and an aspect that subsequently existed as an ideal outlet to design for a series of branded products.
My A2 boards and critically edited .pdf were additionally useful in order to filter out my design development into a summative progression that displayed only what was imperative.
In relation to the 16 page booklet I would have liked to have had more opportunity to experiment with layout to further explore the lessons learnt within my typography workshops with Graham. Non-the-less, the content that I produced sums up what I feel I have learnt most about the design for print process throughout the module and therefore it answers the brief directly. I am openly surprised as to how well it turned out given that the time I spent on it was fractional in comparison to the 'What is Good?' brief. The brief as a whole was absolutely crucial in developing my skills on Indesign and in that respect I am highly appreciative of the task.
Things to do differently next time:
1. Allow more time to explore and complete the final resolution instead of neglecting visual development for research.
2. Be sure to get first hand experience with processes relevant to the brief. In this instance foil blocking and embossing.
3. Set myself smaller deadlines within briefs of this duration. I work a thousand times more efficiently whilst under pressure.
4. Arrange a series of self-initiated crits in order to avoid the conceptual development of an idea riddled with faults.
5. Be realistic with my blogging. Posting a lot isn't always effective or necessary. Design smart.
My approach to this module was heavily weighted toward research and gathering source information, but in reflection I feel this may have been my most significant downfall despite it being essential to my conceptual progression with the brief.
Over the past five weeks the research that I have gathered was relevant and justified and I firmly believe that I managed to explore, develop and evaluate a range of primary, secondary, qualitative and quantitative avenues. In gathering primary sourced information for 'What is Good?' I asked people to respond to surveys posted on E-Studio, conduct left-handed writing experiments and to fill in quick one-to-one questionnaires that were delivered personally. This was crucial in developing my concept as allowing people the freedom to provide the information I needed was particularly time consuming and problematic.
In terms of secondary data, sourcing information from books proved invaluable. Information such as historical left handed personalities and the scientific ways in which left handed people think broadened my knowledge and heavily informed my design decisions. Despite this however, I am confident in saying that I invested far too much time into this process (inclusive of deciding what information would be useful to work from) and as a result my visual development towards a final resolve was neglected, not to mention my exploration regarding crucial print processes that were essential in directly answering the requirements set by the brief.
Overall I am in a position where I do not feel that my skills to select, develop and evaluate were directly at fault; but perhaps in relation to time available I could have identified a key concept earlier and exhausted that option more thoroughly as opposed to multiple ideas... Having said that, my approach to research did pay off in the design process of the 16pg booklet.
2. The level of investigation and experimentation into appropriate production media, processes and technologies.
My investigation into print production media, processes and technologies was in my opinion to a sufficient standard. I took this module as an opportunity to explore the usage of spot and special colours, mono/duo/tri and half toning and in particular print finishes that give a tangible quality to the end product. That said, my experimentation and actual hands-on approach would be something that I'd say I have regrettably neglected a little bit and simply not dedicated enough time towards. Had I have given myself the opportunity to do so, I would of grabbed the bull by the horns and gotten my hands dirty with foil blocking, flocking and embossing/debossing. Needless to say I believe I have educated myself to the best of my abilities through relevant books and publications and therefore this module was theoretically very useful for me.
3. The breadth and quality of practical skills, ideas and design development.
In the literal sense of practical I would say my application of skills was fairly limited and (as mentioned previously) a key area in which I could have explored further. I feel my strengths certainly lie in doing things by hand as identified in last years Design Practice module be it illustration, collage or otherwise; but this again was an area that didn't materialize. Ironically however, the past five weeks were unquestionably useful in developing my approach to design through digital means, more specifically cross-software development. Never before have I switched so fluidly between Photoshop, Illustrator and InDesign to get a design idea completed; and as something I wanted to build upon from last year, I am satisfied. I feel this is likely to be down to the workshops provided; to say they were beneficial would be an understatement. What's more, to expand on this the typography workshops with Graham were in my opinion priceless and as a result I feel my knowledge in this field has improved considerably already.
Looking back to my idea and design development, the module on a whole was a very eye opening experience and insightful as to what can happen when you get caught up in a particular mindset. Through having to change my approach for the 'What is Good?' concept with little more than two weeks to go, I was shown first hand the consequences of losing sight of what was intended originally. In a summative sentence, 'be sure to pursue more frequent feedback from peers and tutors alike' is the lesson I learnt.
4. The documentation, organisation and presentation of your work for this module.
As something that let me down slightly last year, I have to say I feel this was one of my strongest areas throughout the duration of the module and possibly something that has manifested into an obsession. Over the period of the last five weeks I experienced a somewhat overwhelming desire to document, clarify, order and re-order my design development until I was satisfied, and it was a thing that constantly niggled at me until I was either asleep or the problem was resolved. I managed to keep track of my progress in three separate 'To-do List' books as well as a personal diary and action plan sheets. I believe that it showed on submission day where I disturbingly felt quite relaxed in the middle of an action packed studio.
Regarding each brief set, I documented my design development in separate A3 folders that were subsequently categorised chronologically. I obtained additional photographic documentary through cameras and scanning and in light of this compulsion, the presentation of my work for the five A2 boards and critically edited pdf came as a natural progression that required little stress.
The only negative to arise from this is that I may have bitten off more than I can chew in terms of blog posting.
Never the less, this is certainly as aspect of my work ethic that has improved.
5. The success of your final products in relation to the briefs.
Although my resolutions have their positive and negative points, I am collectively satisfied with the end products for both my 'What is Good?' and 'What is Design for Print?' briefs.
Starting with 'What is Good?', the most pleasing aspect for me was the fact that I was able to successfully package a concept that dealt with something which wasn't physical (as opposed to a commonly packaged item such as an event or piece of food). My ability to think laterally was at times pushed to the limit, but this is something I am pleased to have over-come. The resolve itself works conceptually and reflects what was unearthed through conducting thorough, in-depth research. The ability to re-brand an existing organization was also a focus that proved to be of great success and an aspect that subsequently existed as an ideal outlet to design for a series of branded products.
My A2 boards and critically edited .pdf were additionally useful in order to filter out my design development into a summative progression that displayed only what was imperative.
In relation to the 16 page booklet I would have liked to have had more opportunity to experiment with layout to further explore the lessons learnt within my typography workshops with Graham. Non-the-less, the content that I produced sums up what I feel I have learnt most about the design for print process throughout the module and therefore it answers the brief directly. I am openly surprised as to how well it turned out given that the time I spent on it was fractional in comparison to the 'What is Good?' brief. The brief as a whole was absolutely crucial in developing my skills on Indesign and in that respect I am highly appreciative of the task.
Things to do differently next time:
1. Allow more time to explore and complete the final resolution instead of neglecting visual development for research.
2. Be sure to get first hand experience with processes relevant to the brief. In this instance foil blocking and embossing.
3. Set myself smaller deadlines within briefs of this duration. I work a thousand times more efficiently whilst under pressure.
4. Arrange a series of self-initiated crits in order to avoid the conceptual development of an idea riddled with faults.
5. Be realistic with my blogging. Posting a lot isn't always effective or necessary. Design smart.
Thursday, 5 November 2009


Wednesday, 4 November 2009


Friday, 30 October 2009


Tuesday, 27 October 2009


Thursday, 22 October 2009
Type Workshop 04
Carrying on from the final exercise of last weeks workshop, progress today was centered around spanning an entire page of text across columns and experimenting with readability in layout.
The first task was more of a warm up to refresh the memory. It did however show how line breaks can provide the deception that there is less text on a page.
Original:
 Alteration:
 After playing around with type and a single column alone, the logical progression was to experiment with more columns and to add in an image; thus working toward the realms of page design and layout. Again the focus was on the readability of the type... weight, point size and Co. all being crucial as before - especially the number of words per line. Not to mention line breaks!
Two Column:
 Text was aligned to the left, point size and leading adjusted accordingly as to give an 8-12 word per line average... Text wrapping is awfully awkward in InDesign. I'll get the hang of it soon I hope.
Three Column:
 Same as before here, type aligned to the left and all the same precautions were made to achieve a readable average word per line count. I'm not too keen on the image positioning, but as that is a layout issue I won't go into detail.
Four Column: Heading into the depths of a four column grid, I was forced to drop the point size slightly as to fit all of the text on neatly alongside the image. My main mistake here was substituting readability for aesthetics, a valuable lesson learned! As you can see the average word per line count is bordering four to five. Much, much too low.
Five Column:
 The five column grid however, was where the real lesson was learned. Due the document size and greater number of columns, the logical thing to do was to reduce the point size and leading further. The problem arose though in the same ways as before. Not enough words per line to read comfortably and fluently. Cue Grahams words of wisdom... Revert back to spanning text across multiple columns. HOW OBVIOUS. The result is shown below:
 In addressing the problem this way the text is much more readable across two sets of two columns for a number of reasons. Most primarily, the fact that a greater column width allows for more words on a line means that the point size can be increased for an easier and more fluid read. Genius.
Other lessons learnt:
- Leading should be 20% larger than point size. i.e 10pt on 12, 16pt on 19.
-The name for white space that runs through text is called a WIDOW.
- An indent is usually three characters in size.
- ALWAYS print to check readability. Just because it works on screen doesn't mean that it is going to work for print.
x
The first task was more of a warm up to refresh the memory. It did however show how line breaks can provide the deception that there is less text on a page.
Original:
 Alteration:
 After playing around with type and a single column alone, the logical progression was to experiment with more columns and to add in an image; thus working toward the realms of page design and layout. Again the focus was on the readability of the type... weight, point size and Co. all being crucial as before - especially the number of words per line. Not to mention line breaks!
Two Column:
 Text was aligned to the left, point size and leading adjusted accordingly as to give an 8-12 word per line average... Text wrapping is awfully awkward in InDesign. I'll get the hang of it soon I hope.
Three Column:
 Same as before here, type aligned to the left and all the same precautions were made to achieve a readable average word per line count. I'm not too keen on the image positioning, but as that is a layout issue I won't go into detail.
Four Column:
 Heading into the depths of a four column grid, I was forced to drop the point size slightly as to fit all of the text on neatly alongside the image. My main mistake here was substituting readability for aesthetics, a valuable lesson learned! As you can see the average word per line count is bordering four to five. Much, much too low.
Five Column:
 The five column grid however, was where the real lesson was learned. Due the document size and greater number of columns, the logical thing to do was to reduce the point size and leading further. The problem arose though in the same ways as before. Not enough words per line to read comfortably and fluently. Cue Grahams words of wisdom... Revert back to spanning text across multiple columns. HOW OBVIOUS. The result is shown below:
 In addressing the problem this way the text is much more readable across two sets of two columns for a number of reasons. Most primarily, the fact that a greater column width allows for more words on a line means that the point size can be increased for an easier and more fluid read. Genius.
Other lessons learnt:
- Leading should be 20% larger than point size. i.e 10pt on 12, 16pt on 19.
-The name for white space that runs through text is called a WIDOW.
- An indent is usually three characters in size.
- ALWAYS print to check readability. Just because it works on screen doesn't mean that it is going to work for print.
x


Thursday, 15 October 2009
Stocks and Substrates
Today was interesting on many levels, primarily due to the stocks and substrates seminar with Justin. I felt that some of the things that I learnt were invaluable, even though they were arguably of a trivial nature...
- Ink drys faster on coated paper stocks.
In light of todays industry this is increasingly useful for quick turn around. Printing on uncoated paper can often lead to a one or two day wait on the drying process which some clients cannot afford.
- Coated paper is cheaper to print on.
This is because it is mass produced to a greater extent than uncoated. Decisions such as this are important whilst considering the budget of the client.
- It is important to consider the postal costs for heavier stocks.
Something as straight forward as this is an easy aspect to overlook. The simple fact that a weighter stock may be more expensive to post out to customers is all inclusive of your clients budget for the project. Cost is everything.
- Ensure the paper weight is suitable to the format.
Another obvious issue that could be overlooked. Heavier stocks do not always lend themselves well to the mechanics of publications that may be folded. Problems arising from this could include ink cracking and if the documented is intended to remain flat.
All of the above are crucial when considering the process of design for print.
x
Type Workshop 03
Following on from the previous session, the third type workshop today was also quite an eye-opener; not to mention exciting due to the fact there was an actual block of text to work with.
The main issues addressed this time were were all related to how a paragraph(s) of text reads:
 01. Started with upper case, bold type. Fairly big point size for body copy. 12pt if my memory serves correct. Reduced line feed and fully justified.
02. Same as before, dropped the point size a little and increases the leading for a bigger line feed.
03. Dropped the type to lower case and a lower point size that was easier on the eye. Increased the leading again slightly and maintained justification.
04. Dropped the point size even further, I believe it was down to 8.5pt. Leading was increased again, by this point however I think it was beginning to become less readable again.
Exercise two dealt with spanning text across columns; in this instance one, two and one half of a column.
 Each example was aimed to further illustrate how point size, leading and alignment can alter how text reads. The most educational benefit of this task for me was understanding how justified text alters the pace of reading through inconsistent word spacing... Something that you would think makes large chunks of text harder to read. This technique is actually used within novels, which was a confusing aspect of this lesson.
Further things of importance that I learnt:
-A heading is usually 20% superior / inferior to the text size.
-Using upper case type is a brilliant way to make people not read something as it is less readable.
-It's not good if the reader has to keep moving their head, this means the type is probably too small for the width and the reader is therefore having to hold the paper/document too close.
-Large bodies of text are more readable with a serifed typeface. This is due to the fact that it creates a horizontal reading line; the serifs themselves 'interrupt' the ascenders and descenders. Something that is subtle, but effective.
x
The main issues addressed this time were were all related to how a paragraph(s) of text reads:
Readability through:
Serif or Sans Serif
Upper case or Lower Case
Justification and Alignment
Maximum and Minimum word count per line of text
Maximum and minimum character count per line of text
Serif or Sans Serif
Upper case or Lower Case
Justification and Alignment
Maximum and Minimum word count per line of text
Maximum and minimum character count per line of text
The first exercise was designed to make a clear example of this. Filling a column with a passage of type with the aims of making it as readable as possible, then revising it and representing it a further three times. The only rules were that the allocated typeface remained the same. Weight, kerning and leading etc could all be altered at will. I admittedly cheated by trying to make my first attempt particularly difficult to read. I felt the effects of altering different characteristics would then become more apparent this way.
 01. Started with upper case, bold type. Fairly big point size for body copy. 12pt if my memory serves correct. Reduced line feed and fully justified.
02. Same as before, dropped the point size a little and increases the leading for a bigger line feed.
03. Dropped the type to lower case and a lower point size that was easier on the eye. Increased the leading again slightly and maintained justification.
04. Dropped the point size even further, I believe it was down to 8.5pt. Leading was increased again, by this point however I think it was beginning to become less readable again.
Exercise two dealt with spanning text across columns; in this instance one, two and one half of a column.
 Each example was aimed to further illustrate how point size, leading and alignment can alter how text reads. The most educational benefit of this task for me was understanding how justified text alters the pace of reading through inconsistent word spacing... Something that you would think makes large chunks of text harder to read. This technique is actually used within novels, which was a confusing aspect of this lesson.
Further things of importance that I learnt:
-A heading is usually 20% superior / inferior to the text size.
-Using upper case type is a brilliant way to make people not read something as it is less readable.
-It's not good if the reader has to keep moving their head, this means the type is probably too small for the width and the reader is therefore having to hold the paper/document too close.
-Large bodies of text are more readable with a serifed typeface. This is due to the fact that it creates a horizontal reading line; the serifs themselves 'interrupt' the ascenders and descenders. Something that is subtle, but effective.
x
What is Good? - Part 02
 The second part to the What is Good? briefing today demanded clarification on our proposal and concept statement. After a short yet particularly beneficial conversation with Lorenzo I settled with the notion that:
Left Handed is Good Because it is a Catalyst for Change.
This stemmed from the basis that left handed people are scientifically believed to think different to the way that right handers do and what's more, many of the notable left handers I have unearthed from background research have been credited with implementing change in society.
My initial ideas at the moment are still largely within the confines of my skull, but I am keen to focus on design within a series; particularly with the left handed personalities identified previously.
Format ideas may include: Business cards, postcards, stamps or a collection of small books.
x
My initial ideas at the moment are still largely within the confines of my skull, but I am keen to focus on design within a series; particularly with the left handed personalities identified previously.
Format ideas may include: Business cards, postcards, stamps or a collection of small books.
x
Thursday, 8 October 2009
Type Workshop 02
Round two of the typography workshops today and as ever the knowledge I learnt was insightful to say the least.
First things first, when trying to Kern a word you should always start by looking for the largest space that you can't alter and then work with the other spaces accordingly to make them more even. In simplified terms, the starting point should always maintain a kerned measurement of zero.
 With both of the above examples, the letter forms have been spaced further apart as a result of the process mentioned previously. This tends to give a more open and relaxed feel as the word itself maintains a clearer readability and is presented to the eye in an easy to digest format.
 Equally however, reducing the kerning can convey the complete opposite given that the spaces are made tighter and more condensed. This example using the word Railway shows how the smaller spaces force the text upon the eye in a more solid chunk and therefore generates a greater pace of reading.
Another aspect touched upon was hierarchy and the order in which the text will be read. Graham's nifty advice was that in order to have a clear idea of how your composition will work, you should write down and construct your hierarchy prior to arranging the text on the page. This way the design process can often be a lot smoother and less problematic. The examples below are a few attempts at forcing the eye to read from right to left despite our cultural habit to do the opposite, as well as a vertical mix instead a simple top to bottom movement.

 Finally, to build on from this I attempted to apply the same logic with a proverb chosen at random. The idea was that it would be more challenging to the lead around and entire block of text in the order that I was aiming for, especially as I limited myself to only using point size and weight.
 Overall I don't believe that hierarchy isn't as precise as I would have liked. A few words get mixed up and confused when I try to let my eye navigate at its own free will. Non-the-less the exercise was still highly beneficial to me.
x
First things first, when trying to Kern a word you should always start by looking for the largest space that you can't alter and then work with the other spaces accordingly to make them more even. In simplified terms, the starting point should always maintain a kerned measurement of zero.
 With both of the above examples, the letter forms have been spaced further apart as a result of the process mentioned previously. This tends to give a more open and relaxed feel as the word itself maintains a clearer readability and is presented to the eye in an easy to digest format.
 Equally however, reducing the kerning can convey the complete opposite given that the spaces are made tighter and more condensed. This example using the word Railway shows how the smaller spaces force the text upon the eye in a more solid chunk and therefore generates a greater pace of reading.
Another aspect touched upon was hierarchy and the order in which the text will be read. Graham's nifty advice was that in order to have a clear idea of how your composition will work, you should write down and construct your hierarchy prior to arranging the text on the page. This way the design process can often be a lot smoother and less problematic. The examples below are a few attempts at forcing the eye to read from right to left despite our cultural habit to do the opposite, as well as a vertical mix instead a simple top to bottom movement.


 Finally, to build on from this I attempted to apply the same logic with a proverb chosen at random. The idea was that it would be more challenging to the lead around and entire block of text in the order that I was aiming for, especially as I limited myself to only using point size and weight.
 Overall I don't believe that hierarchy isn't as precise as I would have liked. A few words get mixed up and confused when I try to let my eye navigate at its own free will. Non-the-less the exercise was still highly beneficial to me.
x
Sunday, 4 October 2009
Unique
Although this has been a realisation that I have had to live with all of my life, the past couple of days worth of research has led me to the idea that one positive aspect of being a lefty is that it's more unique. The amount of right handed people moaning that their handedness is boring and common has been quite surprising! Obviously I already knew being left handed was more unique and cool, but you know... I had to prove it and right handers don't usually admit to things such as this! A step in the right direction I feel!
Anyway, to visualize this more effectively I rounded up statistics from across all three year groups that are currently studying on the course and presented their names on two sheets, leftys Vs rightys...

 Overall there are 147 students, 130 of which are right handed, just 17 are left handed. That's roughly one in every eight to nine students. Slightly below the 1 in 7 average I was educated by as a kid.
It's quite interesting that their aren't more of us however as left handers are supposed to excel in the arts due to the way our brains work.
x
Thursday, 1 October 2009
Leftys
Following on from a morning of typographical heaven, I spent this afternoon conducting a bit of research into my finalised topic of interest 'Being Left Handed is Good'. One of the first things that bizarrely interested me was to find out who actually is (or was) left handed in this world and besides the obvious and prime example of myself, I was aiming to unearth a range of high profile personnel that had in one way or another contributed to society in positive way or had perhaps done something worthy of praise, celebration or recognition.

 In sifting through countless websites and pages in books I resulted with an initial list of just over eighty - a list that was admittedly quite selective. Still looking at the names in front of me now, I am rather surprised by the diversity of personalities that include some of the most significant figures in recent history, aka. Ross Kemp.
On a serious note though, here are some of the most credible and surprising individuals that should capture your interest:
Einstein, Da Vinci, Michelangelo, Napoleon, Issac Newton, Aristotle, Julius Caesar, Gandhi, Mozart, Beethoven, Churchill, both Brad Pitt AND Angelina Jolie, both Neil Armstrong AND Buzz Aldrin, Bill Gates, Pele, Maradona.
oh erm... Charlie Dimmock and Jack The Ripper too.
x
Type Workshop 01
The first of the typography workshop sessions today was all about considerations that should be addressed before you even place anything on the page as well as during the design progress as an on-going awareness of the letter forms and how they affect the compositions readability.
The key aspects are as follows:
The main thing that I took away from today was how these different considerations can alter the connotations of a letter form or word in regards to sound or temperament. Loud, soft, quiet or angry, happy, lonely for example.
Exercise 01: Lonely Dog.
 To portray a lonely dog I used a light looking, sans serif typeface in lower case. The weighting was Roman and point size fairly small; 12pt I think. What's more I also placed the word in the bottom right-hand corner of the page as it's the last place you look when reading left to right as our culture does.
Exercise 02: Angry Dog.
 To demonstrate an angry dog I used a bold and strong structured typeface that was of a large point size and in uppercase. I aimed to make it bigger than the actual size of the composition to give the impression that the 'dog' was close up and in your face with an attitude... I actually feel like a geek, but aspects such as these are crucial.
Anyway, thanks to a brief demonstration by Graham I was also educated in thinking about how a reader actually reads a document; something so straight forward it's easy to overlook. A magazine is held further away than a novel for instance and as a result different typographic decisions have to be made to compensate for this. The number of words on a line, the word alignment/justification... not to mention all of the above.
Such a headache, but I love it!
x
The key aspects are as follows:
Size / Size
Weight / Weight
Serif / Sans Serif
UPPER CASE / lower case
Weight / Weight
Serif / Sans Serif
UPPER CASE / lower case
The main thing that I took away from today was how these different considerations can alter the connotations of a letter form or word in regards to sound or temperament. Loud, soft, quiet or angry, happy, lonely for example.
Exercise 01: Lonely Dog.
 To portray a lonely dog I used a light looking, sans serif typeface in lower case. The weighting was Roman and point size fairly small; 12pt I think. What's more I also placed the word in the bottom right-hand corner of the page as it's the last place you look when reading left to right as our culture does.
Exercise 02: Angry Dog.
 To demonstrate an angry dog I used a bold and strong structured typeface that was of a large point size and in uppercase. I aimed to make it bigger than the actual size of the composition to give the impression that the 'dog' was close up and in your face with an attitude... I actually feel like a geek, but aspects such as these are crucial.
Anyway, thanks to a brief demonstration by Graham I was also educated in thinking about how a reader actually reads a document; something so straight forward it's easy to overlook. A magazine is held further away than a novel for instance and as a result different typographic decisions have to be made to compensate for this. The number of words on a line, the word alignment/justification... not to mention all of the above.
Such a headache, but I love it!
x
Wednesday, 30 September 2009
What is Good?
Another new briefing today, the problem being to simply define what is good? So first things first... a coffee, two paracetamol to combat my epic cold and a mind mapping session.
 The problem with this list above however was that I was within a group of six lads. Don't get me wrong they're all great, but the list... well. It was definitely compiled by a group of 20 to 25 year old dudes. As a result I decided to create an additional list of my own that encapsulated the obvious with the little more obscure. Here's some of the stuff I came up with:

 I'm not quite certain as to what I'll pick as the options are endless, but something with a personal touch such as being left handed is definitely as aspect I might try and push further. This is due to the fact that there are often negative connotations surrounding being left handed and it would be interesting to open up the eyes of right handed people as it is certainly not a 'bad' part of my day to day life.
Other interesting options may include moustache days, things in straight lines, the Coca-cola / Pepsi debate or nosebleeds. We'll just have to see.
x
 The problem with this list above however was that I was within a group of six lads. Don't get me wrong they're all great, but the list... well. It was definitely compiled by a group of 20 to 25 year old dudes. As a result I decided to create an additional list of my own that encapsulated the obvious with the little more obscure. Here's some of the stuff I came up with:
 I'm not quite certain as to what I'll pick as the options are endless, but something with a personal touch such as being left handed is definitely as aspect I might try and push further. This is due to the fact that there are often negative connotations surrounding being left handed and it would be interesting to open up the eyes of right handed people as it is certainly not a 'bad' part of my day to day life.
Other interesting options may include moustache days, things in straight lines, the Coca-cola / Pepsi debate or nosebleeds. We'll just have to see.
x
Tuesday, 29 September 2009
What is Design for Print? - 16 Pg booklet
 The new briefing today specified the production of a sixteen page book in response to the question 'What is Design for Print?'. These are just a few initial considerations that I believe to be vital in approaching the task. Thank god for those type and grid workshops last year...
It's quite intimidating that I have seven weeks to justify what I come up with for this, I might have to look at binding methods as well!
x
NB: Ignore the mix up on additive and subtractive colour, I was pretty tired whilst copying these notes across from my other notebook.
Thursday, 24 September 2009
Summer Postcards Pt.02
Over the past two days I have managed to complete my intended photo-shoot and progress with some illustrative ideas for the pictogram, logo and chosen word. Thankfully the weather was nice for shooting outside the restaurant so the imagery is just like a holiday brochure. They didn't let me photograph inside however, Wagamama has lost a little bit of my respect for that I have to say!
Anyway, here are the fruits of my labour thus far:
FULL COLOUR (CMYK):


ONE COLOUR PICTOGRAM:


As you can see I have altered my approach toward the one colour pictogram as I felt my original concept didn't address the 'representation of an activity' close enough. Instead I have chosen to again focus on the consumption of noodles via chopsticks. This in my opinion is significantly more successful and conveys a much more direct and universal meaning.
TWO COLOUR LOGO: Building on my previous development, I've chosen to maintain experimenting with how the logo might look with a noodle like entity flowing through the letter forms. From here I feel I need to explore as to whether it should be just outline or a solid fill. I think there is definitely more potential than the continuous line illustrations completed prior to this.
THREE COLOUR WORD:

Finally, in tackling the three colour 'word' composition I have opted for the word 'noodles' as to maintain the oriental theme. The letterforms themselves are illustrated to represent noodles and will keep the black line work. I intend for a fill colour to be a noodle-esque yellow/beige with the red of the star completing the triad. It's still early doors, but I am pleased thus far.
x
Anyway, here are the fruits of my labour thus far:
FULL COLOUR (CMYK):


ONE COLOUR PICTOGRAM:


As you can see I have altered my approach toward the one colour pictogram as I felt my original concept didn't address the 'representation of an activity' close enough. Instead I have chosen to again focus on the consumption of noodles via chopsticks. This in my opinion is significantly more successful and conveys a much more direct and universal meaning.
TWO COLOUR LOGO:
 Building on my previous development, I've chosen to maintain experimenting with how the logo might look with a noodle like entity flowing through the letter forms. From here I feel I need to explore as to whether it should be just outline or a solid fill. I think there is definitely more potential than the continuous line illustrations completed prior to this.
THREE COLOUR WORD:


Finally, in tackling the three colour 'word' composition I have opted for the word 'noodles' as to maintain the oriental theme. The letterforms themselves are illustrated to represent noodles and will keep the black line work. I intend for a fill colour to be a noodle-esque yellow/beige with the red of the star completing the triad. It's still early doors, but I am pleased thus far.
x
Subscribe to:
Posts (Atom)
